
Are you tired of dealing with spam comments, unwanted traffic, or malicious attacks on your WordPress website? One of the most effective ways to keep your website safe is by blocking specific IP addresses or even entire countries.
In this updated guide, you will learn how to track down and block malicious IP addresses on your WordPress website. WordPress makes it incredibly easy, and we will walk you through every step.
Key Takeaways
This article provides a comprehensive guide for blocking IP addresses or entire countries in WordPress. It explains how to identify malicious IP addresses by analyzing website activity logs or monitoring comments. We will dive deep into how to add a “bad IP list” into the WordPress Discussion Settings page, exploring the powerful features of the Disallowed Comment Keys. The article also covers the use of Cloudflare’s Web Application Firewall (WAF) to block countries at the edge, and a plugin called IQ Block Country for blocking countries at the application level, including the process for obtaining and uploading the necessary GeoLite2 data file. Finally, we include notes about the effects of IP address blocking on search engine optimization (SEO).
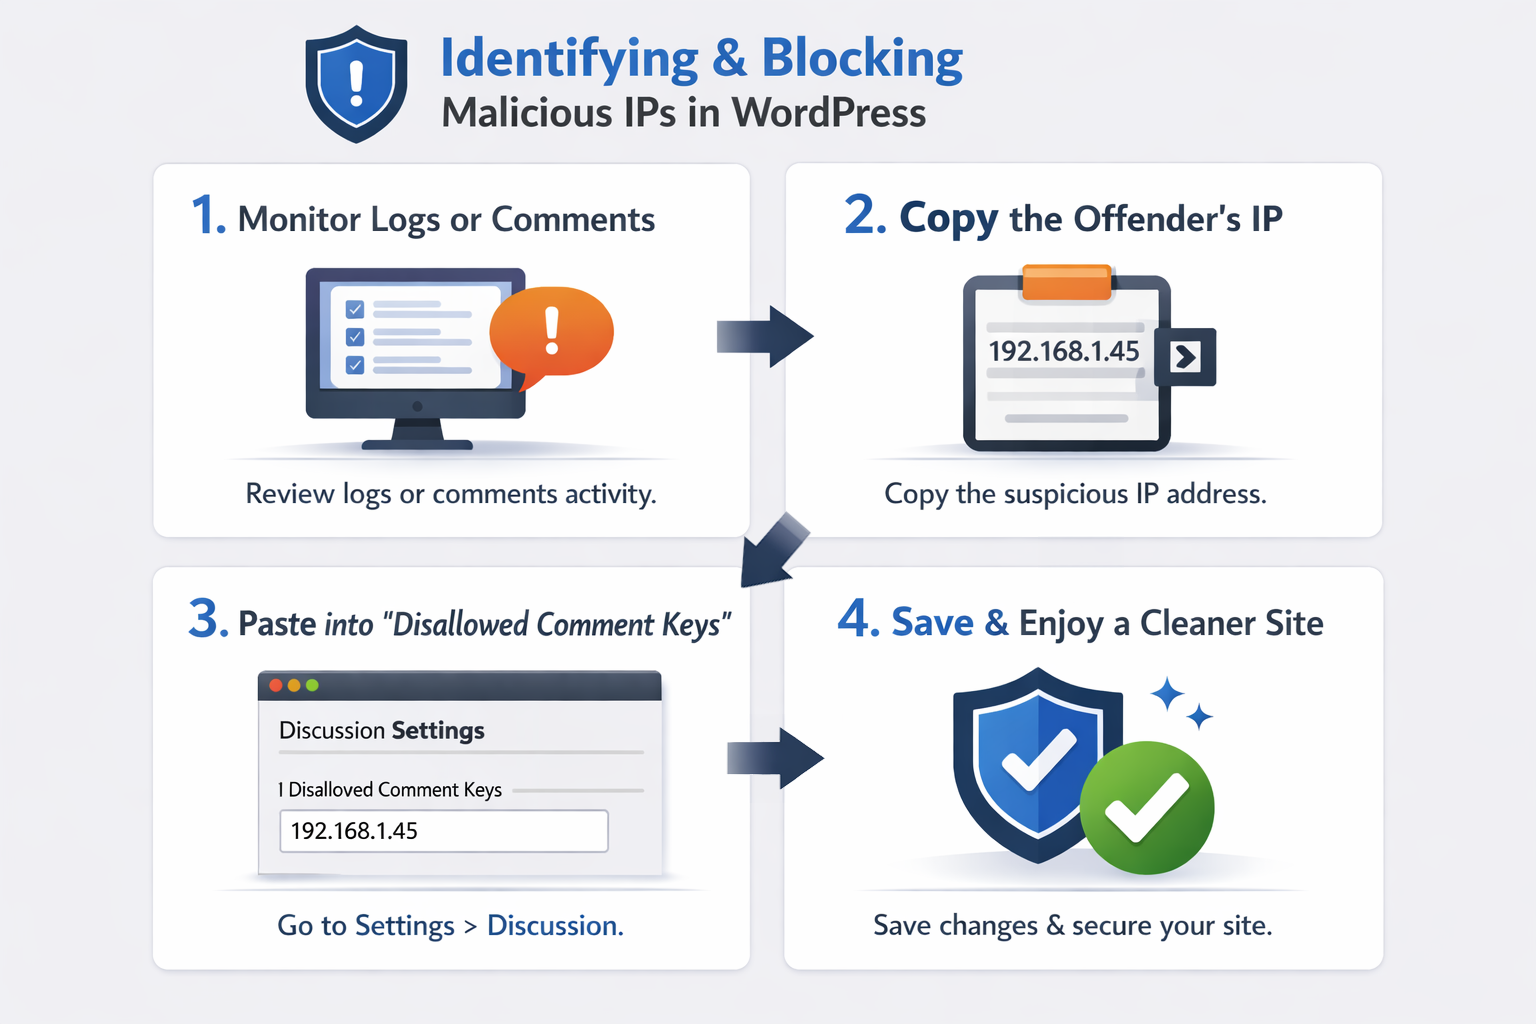
Step 1: How Do I Identify Malicious IP Addresses?
The first step in blocking IP addresses is to identify the addresses that need to be blocked. This can be done by analyzing your website’s activity logs or by monitoring comments on your website.
When you receive a spam comment in WordPress, the system automatically logs the IP address of the person (or bot) who wrote it. You can find this information directly beneath the author’s details in the Comments section of your WordPress dashboard.
Most modern security plugins provide comprehensive data on bad logins and malicious activity, including the offending IP addresses. Plugins like Wordfence, Solid Security, or Sucuri will log these attempts and often provide a simple button to block the IP directly from their interface.
Step 2: Where in WordPress Do I Add My Bad IP Addresses List?
With your IP addresses list in hand, navigate to the Discussion Settings panel in your WordPress dashboard. This can be found by going to Settings > Discussion in the left-hand sidebar.
Scroll down until you find the sections titled Comment Moderation and Disallowed Comment Keys. Paste your bad IP address list into the respective box and click Save Changes at the bottom of the page.
Step 3: Deep Dive into WordPress Discussion Settings
Did you know that your WordPress Discussion Settings options page allows for the blocking of much more than just IP addresses? You can block specific words, URLs, and email addresses natively, without needing any additional plugins. This is one of the most underutilized features in WordPress, and it can dramatically improve your site’s security and user experience.

Let’s break down the two main areas you can use to control spam and unwanted interactions:
1. Comment Moderation (The “Hold for Review” Queue)
The Comment Moderation box is designed to catch potentially spammy comments and hold them in a moderation queue for your manual approval. If a comment matches any of the criteria you set here, it will not be published immediately. Instead, it will appear in your Comments dashboard where you can review it, approve it, or delete it.
Link Limits
You can set a rule to hold a comment in the queue if it contains a certain number of links. Spammers love to drop multiple links; setting this to 2 or even 1 is a great defense.
Matching Keys
When a comment contains any of the words, author names, URLs, email addresses, IP addresses, or browser user agent strings you list in this box, it will be held in the moderation queue.
How it works: The matching is substring-based, meaning it matches inside words. So, if you add the word “press”, it will also flag comments containing the word “WordPress”. Add one word or IP address per line.
2. Disallowed Comment Keys (The “Auto-Trash” Feature)
The Disallowed Comment Keys box (formerly known as the Comment Blacklist) is the nuclear option. It works exactly the same way as the Comment Moderation box, but with one critical difference: comments that match these words will be deleted immediately and put in the Trash without any notification.
What to Put Here
This is where you paste your list of known malicious IP addresses. You should also include common spam keywords (e.g., “viagra”, “casino”, “buy cheap”), known spam email domains, and malicious URLs.
Caution
Because this feature automatically trashes comments, be careful not to use overly broad terms that might accidentally catch legitimate comments from real users.
Best Practices for Discussion Settings
| Setting | Purpose | Example Values |
|---|---|---|
| Comment Moderation | Hold for manual review | 192.168.1.1, “click here”, example.com |
| Disallowed Comment Keys | Auto-delete immediately | viagra, casino, 192.168.1.45, [email protected] |
| Link Limits | Hold if too many links | 2 or 3 links (adjust based on your audience) |
Testing Your Settings
WordPress provides a helpful feature to test your moderation and disallowed keys against past comments. After adding new entries to either box, scroll down and look for the link that says “Check past comments against moderation list”. Click this link to see which of your existing comments would be flagged under your new rules. This helps you avoid accidentally trashing legitimate comments.
Step 4: How Do I Block Entire Countries from Visiting My WordPress Website?
Sometimes, blocking individual IPs isn’t enough, especially if you are receiving a massive influx of malicious traffic from specific regions where you do not do business. In these cases, country blocking (geoblocking) is the answer. This technique is particularly useful for businesses that operate in specific geographic regions.
There are two primary ways to achieve this:
- Through Cloudflare (Edge-Level Blocking) – Fast, efficient, and prevents traffic before it reaches your server
- By using the IQ Block Country Plugin (Application-Level Blocking) – Easier setup, no DNS changes required
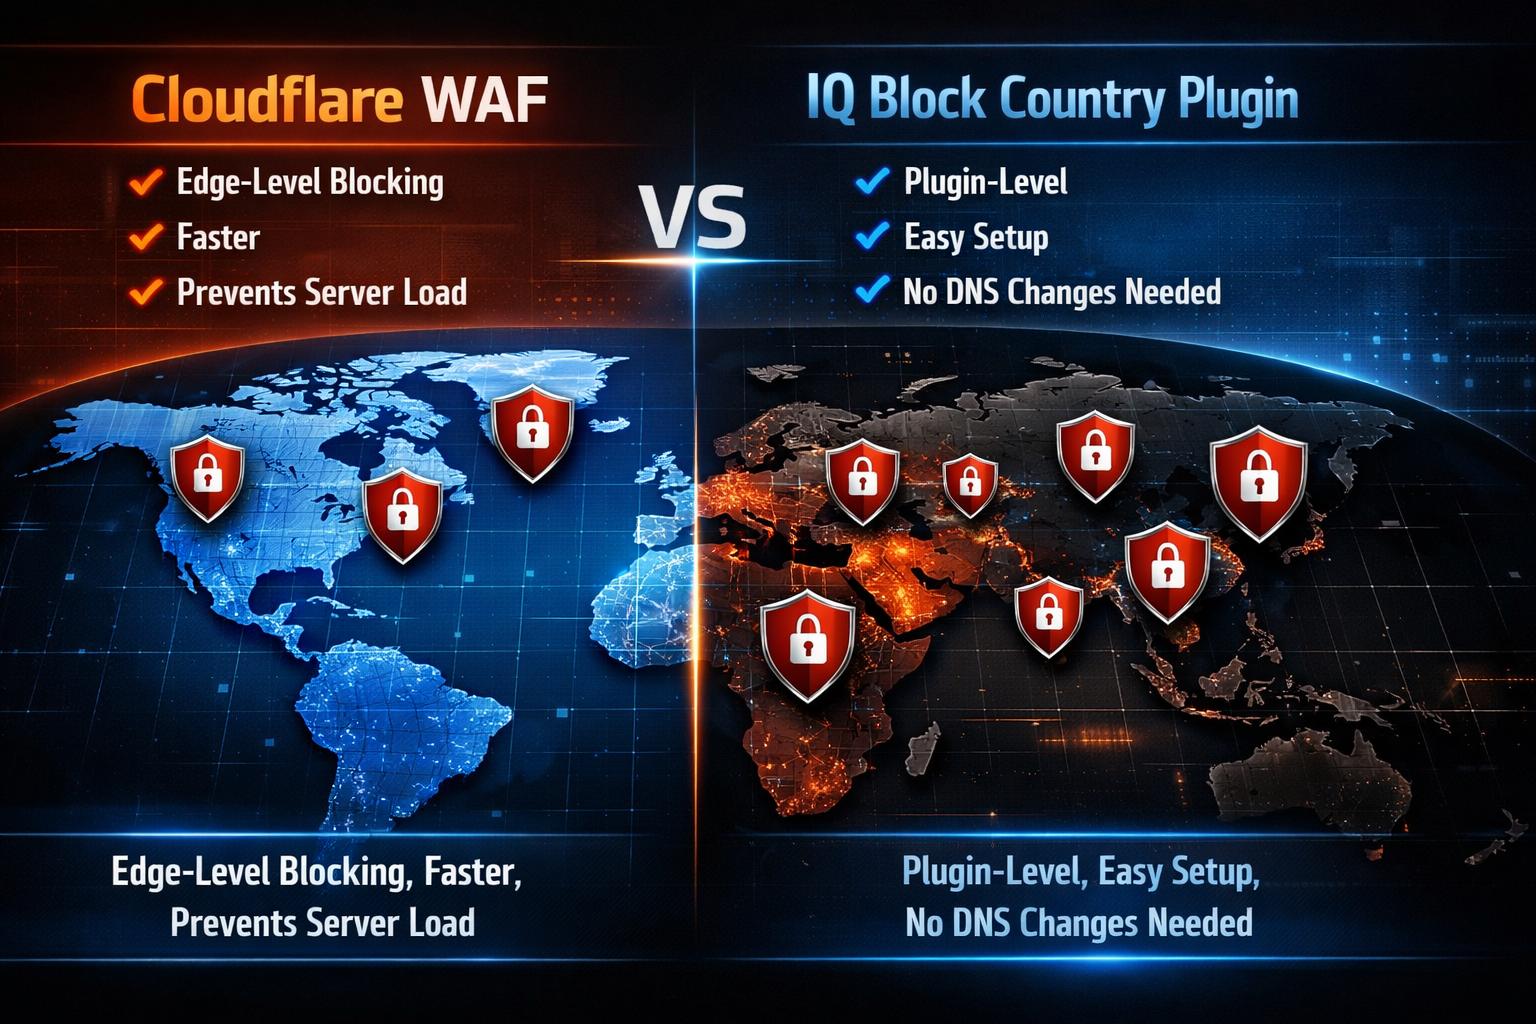
4.1: Let’s Start with Cloudflare
Cloudflare provides a free domain name management service and, most notably, a free Content Delivery Network (CDN) service. Cloudflare sits between your visitors and your web server, filtering traffic before it reaches your site.
Cloudflare includes a powerful Web Application Firewall (WAF) that is available even on their free tier. Blocking or excluding countries, or connections from the TOR network, is incredibly easy and highly effective because it stops the traffic at Cloudflare’s servers before it ever reaches your WordPress host. This saves your server resources and bandwidth.
To set this up:
- Log in to your Cloudflare dashboard
- Navigate to Security > WAF
- Click Create Rule
- Set the field to Country
- Choose the countries you wish to block
- Set the action to Block
- Save and deploy the rule
4.2: Using the Plugin IQ Block Country
If you prefer to manage everything from within your WordPress dashboard and don’t want to route your DNS through Cloudflare, you can use a plugin. The iQ Block Country plugin is a robust, free option with over 20,000 active installations.
To install the plugin:
- Go to Plugins > Add New in your WordPress dashboard
- Type “iQ Block Country” into the search box
- Click Install Now
- Click Activate
Setting Up the GeoLite2 Database
The plugin requires a geolocation database to know which IP addresses belong to which countries. It uses the free GeoLite2 database from MaxMind. Due to licensing restrictions, the plugin cannot download this automatically; you must do it manually.
Step-by-step setup:
- Create a MaxMind account: Visit the MaxMind GeoLite2 page and sign up for a free account.
- Log in and navigate to downloads: Once logged in, look for the “Download Databases” link in your account dashboard.
- Download the Country database: Find the GeoLite2 Country database and download the GZIP file (not the CSV version).
- Extract the file: On your computer, extract the GZIP file. Inside, you will find a file named
GeoLite2-Country.mmdb. - Upload to your server: Using an FTP client or your hosting control panel’s file manager, upload the
GeoLite2-Country.mmdbfile to thewp-content/uploads/directory of your WordPress website. - Verify installation: The iQ Block Country plugin will automatically detect the file once it is uploaded. You should see a confirmation message in the plugin settings.
Configuring the Plugin
Once the database is in place, navigate to the iQ Block Country settings page in your WordPress dashboard. Click on the Frontend tab. Here, you will see a list of all countries. Simply check the boxes next to the countries you wish to block from viewing your website content, and click Save Changes.
You can also set up backend blocking (to prevent logins from specific countries) by clicking the Backend tab.
That’s all there is to it. From here on out, those would-be spammers should no longer be able to openly pollute your post comments or access your page from the IP addresses or countries you have blocked.